To make the clear coat shine like new, or even more, it’s necessary to repair it. Even the best waxes, won’t get us near the results of such a procedure.
Many consider this to be a difficult process, but that’s not true at all. We just need to remember a few things which are described in this article. The fact that it’s time-consuming is true. To remove the scratches properly, we’ll need a free weekend. Luckily when we decide to do the work ourselves, instead of going to a detailing company, we can save a lot of money. And that’s even if we have to buy a polisher!
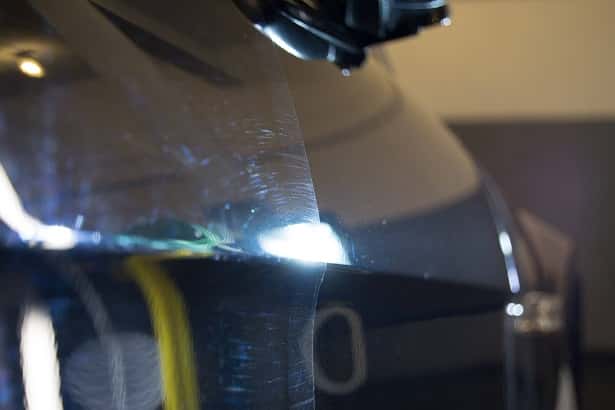
Pic. Car polishing result. The left side before and, the right side after clear coat repair.
The fundamental thing – clear coat repair is a permanent procedure, the result of which (with proper clear coat protection) lasts up to a few years.
Naturally, after the clear coat repair, we need to be mindful of a few things to ensure that the car is devoid of scratches for several months. First of all – automatic car washes – are to be avoided like the plague and it’s not about the quality of the brushes themselves or the material they are made of, but about the sand particles that are wiped off the clear coat, leaving behind a lasting souvenir.
Secondly, we should remember to start with an active foam pre-wash. It can be applied manually and with a jet wash, remember to apply it from the bottom to the roof of the car.
Thirdly, we need to choose the right car washing tool. The best solution is a glove which was created for this task made of delicate microfibers or sheep’s wool.
Fourthly, if we want to wash our car in a perfectly safe way, we must use the Two-Bucket Wash Method. We’ll need one bucket with water and car shampoo, and a second bucket with a dirt separator at the bottom, for rinsing the glove.
Another method to preserve the result (to be considered only after the repair of the clear coat), which additionally enhances the gloss, is the application of a ceramic coating. Something that also works great and is much cheaper is a good wax applied after the repair, although it’s worth applying it more often – e.g. every 3 months. So how do we start?
The most common clear coat damage – swirls and oxidation
Clear coat repair is the most enjoyable when we have to remove swirls and oxidation of the clear coat, which are the most common damage resulting from regular car usage. In simpler terms, swirls are circular scratches, most visible in intense sun light.
Oxidation is simply tarnished clear coat. The latter can be most often found with older acrylic clear coats, but also with metallic ones. All it takes is the car having a collision and the painter screwed things up.
A clearly visible orange peel in this case is the result of incorrect painting.
The so-called orange peel is not the easiest defect to remove. In this case, before we start the repair using the polishing machine, we need to use waterproof sanding paper and manually remove the uneven clear coat texture.
There are also sanding discs – for polishing machines – that can be used on flat surfaces. However, it’s better to polish the edges and bends of the car body by hand. This way we’ll avoid getting through to the base.
No one should be scared by the fact that using waterproof sanding paper will completely tarnish the clear coat, this is normal. We will restore the shine later with a polishing paste, and a sponge or fur.
When removing the orange peel, we can use sandpaper in the range from P2000 (quite thick) to P2500 (very fine). To begin, try P2500, if it doesn’t work, lower the grit. If we start with P2000, it may turn out that afterwards we will have to polish the car for a long time with polishing fur, or correct it with P2500.
Thicker paper eliminates the orange peel faster, but also creates thick scratches which are laborious to remove.
Using this method we can get rid of the orange peel effect. However we do need to be prepared, for many hours of work.
Holograms
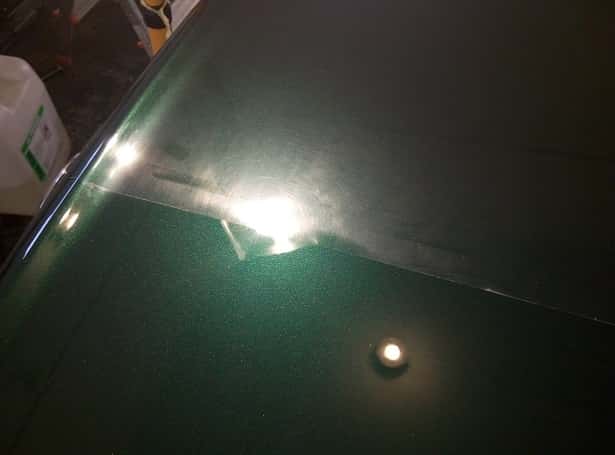
Holograms are a signal that someone has already tried to tinker with the clear coat, but forgot to finish the job. Holograms are created during the first stage of the repair, i.e. removing the deepest scratches, using a hard sponge (or fur) and a cutting paste, for the so-called cut.
Holograms are just traces left by a polishing machine. The question is – has that someone who tried to refresh the clear coat removed all swirls and oxidation?
If so, the task is simple, we take a finishing paste, a soft sponge and remove the holograms. However, if thicker scratches are visible from underneath the holograms, the clear coat repair process must be performed from the beginning.
Cutting, polishing and finishing pastes – which one is for polishing the clear coat
Most polishing pastes have 3-4 varieties. In the first category we have heavy cut – cutting pastes, which are used to erase deep scratches. In other words, when we start the clear coat repair, we take the cutting paste in our hands and polish the entire car with it.
This way, we will quickly get rid of deep scratches, swirls, matting and holograms. Because the clear coats are usually quite hard, this applies to over 90% of cars. Especially to metallic clear coats from BMW and Audi, removing scratches from these takes more time than from other manufacturers cars.
However, there are cars with acrylic clear coats, non metallic ones, which are more delicate. Those are primarily Japanese cars, with an emphasis on Honda, where it’s very easy to get a mirror finish even out of metallic clear coats.
The other side of the coin is that they get scratches faster. Anyway, when we are dealing with such a case, we should start with a polishing paste (fast cut), i.e. medium abrasive straight away.
Regardless of what paste we start with, we always need to polish the car once more using a finishing paste (ultra fine), i.e. finishing or glossing. If we opt out of this procedure, there is a high probability that the car will be left with holograms.
They will be invisible in the evenings and in cloudy weather, but they will be clearly visible in the full sun. Good clear coat repair simply requires at least two stages. An exception to this rule happens very rarely.
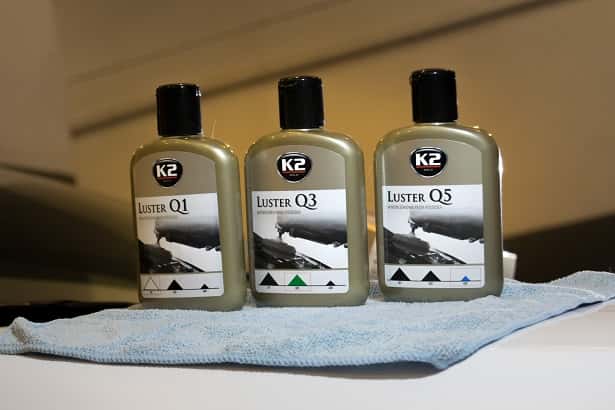
For hard varnishes, we use Q1 paste, for soft ones Q3. Using Q5 as the second or third stage of clear coat repair is a must in order to achieve the wow effect.
Read also an article: ,,How to choose the right wax for you car? [VIDEO]”.
Which sponges, or polishing pads to use for polishing the clear coat
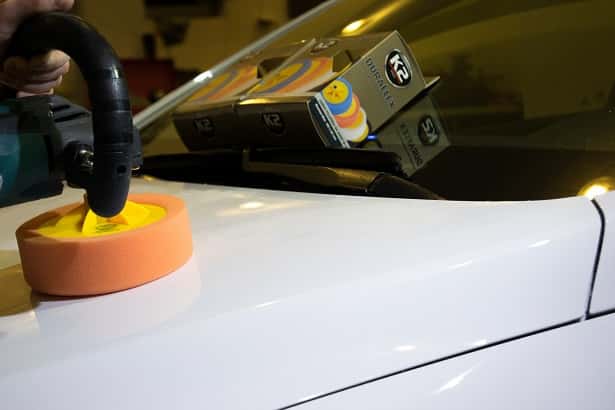
Pads, or simply polishing sponges, come in different colors for a reason. Like polishing pastes, pads are divided into cutting (highly abrasive), polishing (medium abrasive) and finishing – for a glossy finish.
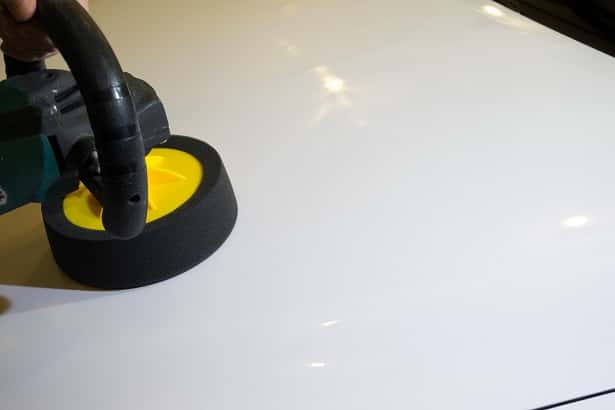
The last one often appears in black, but it varies with the others, so before buying it’s worth checking twice. The principle of use is simple. Highly abrasive paste + highly abrasive sponge, polishing paste + medium sponge and finishing paste + soft sponge.
Before polishing, we should think about the proper preparation of the car’s clear coat.
The hard polishing pad removes scratches very well, but can leave holograms.
In addition, pads come in two versions – one is screwed on a polisher and the other is attached to a Velcro stand, which is then screwed on the polisher. During work it doesn’t really matter though. Let’s buy what’s cheaper. Sponges also come in different diameters. The standard and the most convenient one is the 150 mm diameter version.
We can also get smaller pads, which are more convenient for polishing different nooks and crannies of the car body. However, this is optional, because the job can be done perfectly well with a standard sponge.
There exists also an unsung hero who should be included when the use of a hard sponge and a highly abrasive paste does not give satisfactory results. The hero’s name is polishing fur and its use will be almost 100% needed when we get on with the repair of a fairly new BMW with a metallic clear coat.
We use the fur with a hard paste. Its advantage is that it removes deep scratches very quickly. It also has its drawbacks – it dusts quite heavily, usually leaves holograms that need to be removed with a finishing paste, or when this doesn’t work – a polishing one, i.e. medium, with the help of a polishing sponge.
Fur, a tool for special tasks. We use it when hard sponges can’t handle the scratches.
Rotary polishers – better for the first stage
The most popular and the cheapest polishing devices are the so-called rotary machines. It is pretty much nothing but a grinder, which, however, works at a lower speed. The devices are equipped with a potentiometer, which – depending on the model –can be adjusted in the range of approximately 500 to 4000 rpm.
When choosing a polisher, it is worth paying attention to whether it has a button that blocks the device from turning off. Thanks to this, we won’t have to keep holding the „on” button. Many cheaper machines have the switch designed in a way where continuously holding it is necessary, which makes work harder. The biggest advantage over Dual Action (DA) machines is the high clear coat cutting force, i.e. the thickest scratches are removed much faster.
The disadvantage is that the rotary polisher slips away from the hand more than the DA polisher does and requires more attention – it is easier to burn the clear coat. While polishing metal parts can be considered fairly safe, it is worth reducing the rpm on plastic components from 3,000. down to a maximum of 2,000 rpm. It is worth keeping in mind that many cars not only have plastic bumpers, but also front fenders. We also need to be careful with the edges of the clear coat.
Dual Action polishers – better for the finish
Dual Action devices, also oscillating-rotating, or orbital, are much better suited for finishing clear coat. In addition to spinning the pad around, they also move it sideways, which limits the possibility of holograms being created.
That is why they work better in one-step repairs, and in applying waxes and cleaners. Their advantage is the ease of use. They don’t slip away from the hand, like rotation ones, nor do they excessively heat up the clear coat.
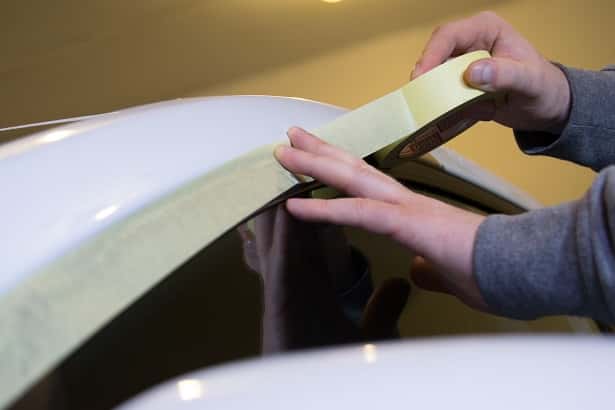
This means that we don’t need to be so careful near the edges of the car body or the plastic parts. In this case, we don’t even need to cover the gaskets with varnish tape, as there is a small probability that we will damage them. But it’s still worth doing, because then we won’t have to wash the polishing paste out of them.
When choosing a Dual Action machine, it is worth making sure that it has a soft start function. It should also have a rotation stabilization function, which means that it will maintain its speed regardless of how hard we press it against the clear coat.
Of course, a very smooth speed regulation is also welcome, so that the work with the machine itself is comfortable and safe for the clear coat. At the time of purchase, it is necessary to pay attention to the length of the power cable, which should be at least 5 m long.
The more precisely we secure the seals, the less work we will have with removing the paste residue from them.
Oscillating machines also have their drawbacks. First of all – these devices are more expensive. In addition, removing scratches in the first stage of the repair with a Dual Action machine will take more time than with a rotation one with polishing fur.
And the polishing pads wear out faster. It is worth remembering that in this case we don’t use 5 cm high pads, but ones that are two times smaller. The use of larger ones limits the power of the device. They are higher, so more energy goes into the flexibility of the pad, and not into the clear coat.
Therefore, the ideal solution is to use a rotary polisher, with a hard sponge and a abrasive paste during the first stage, and an oscillating one with a soft sponge and finishing paste during the second stage. A soft sponge with a soft paste on a rotary machine will also perfectly remove holograms. It’s just that there will be more work with the polisher.
Excess paste
During the work, it may happen that there will be some excess paste left over. In this case – first of all – it is worth applying less to the next element. The excess paste should be sprayed with an IPA atomizer, i.e. diluted isopropyl alcohol (half and half, preferably with demineralized water).
We can also invest in a surface degreasing liquid, which will facilitate the removal of the paste. If there are traces of paste left over on the element, then it is enough to wipe it off with dry microfiber. However, we must remember to use a soft, unused and clean microfiber cloth.
If despite this the paste stays on the clear coat and begins to stick to it, it means that we need to replace the polishing pad with a new one, or clean it. In the latter case, we have to remove it from the polisher and rinse it with warm water to squeeze out as much old paste as possible.
Then we need to dry it with a clean microfiber cloth, preferably by pressing them firmly against each other. That’s not all, as the pad will still be wet at this point. It’s best to wait, but we can also put it on a rotary polisher and start the device gradually increasing the speed from minimum to maximum.
This is the quickest way to get rid of the remaining moisture. However, care must be taken to ensure that the water does not get into the polishers motor. That is why we start with minimum speed and hold the device with the pad facing down.
How to polish the clear coat?
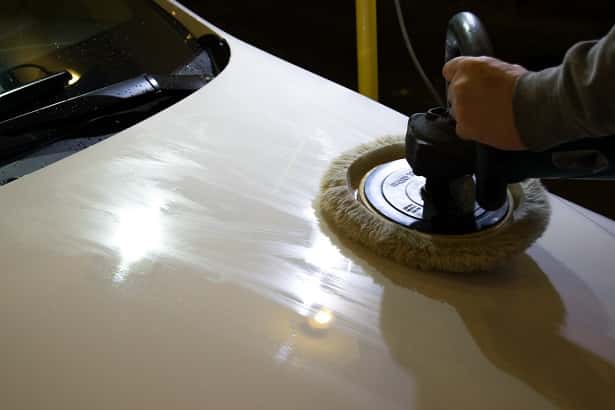
With the polisher’s rotations turned to very slow, we’re lightly pressing it against the surface. The job should be divided into small parts, it is not worth doing a whole element in one go. For example, it’s best to divide the cars hood into 3 or 4 parts, depending on the size, and to work on each part separately. This way, we will do the job more precisely and we won’t be working on dried paste.
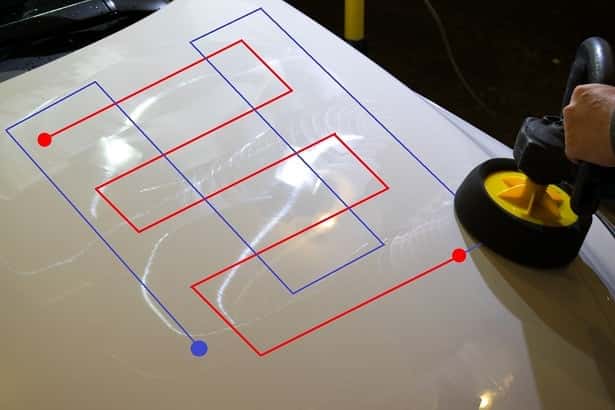
How to use the machine? In the simplest way possible. First, we put the paste on the clear coat, then we spread it with the machine turned off on the part that we want to polish. Then we turn the polisher on while it’s applied to the clear coat and we move it very slowly to the left or right.
Then we move the pad up or down by the diameter of the plate, so that the trace of the next „passage” overlaps the trace made earlier. In this way, we go down or up the element. Then we return to the starting point and repeat the process, but instead of going from left to right, we go from top to bottom.
If we don’t „wave” the polisher in every direction, but carefully and slowly guide it over the clear coat, we will remove the scratches faster.
Once in a while, it’s also worth checking if the section which we’re polishing hasn’t become too hot. If it’s very hot to the touch, we need to move to another part of the clear coat.
We should avoid fast movements, as well as holding of the device in one place excessively, e.g. when removing deep scratches. In addition, large scratches should be polished vertically, and not horizontally.
When we finish the first stage of the clear coat repair, we have to remember to repeat the whole thing with a soft sponge and a finishing paste. This process is much shorter, because we’re removing only small scratches and holograms. Polishing each fragment once or twice should be enough to archive an amazing result.
Inspection – how to check the outcome?
The fact that we made two „passes” with the polisher on a part of the hood, using a hard sponge and abrasive paste, does not mean that all scratches have disappeared. To make sure that they’re not there, we need to wipe the paste off of the clear coat.
If there is a lot of paste left, first we spray the excess with IPA alcohol or a degreaser. When there are traces of the paste on the clear coat which can’t be wiped off – no need to worries. Those can be ordinary holograms, which we will remove on the second approach, i.e. the finish of the clear coat.
The inspection is best done using a good degreaser, but IPA alcohol diluted with water will also work.
The best light for clear coat inspection
Without an additional light source, it will be difficult to determine whether we’ve actually removed all the scratches. Of course, it’s best to stock up on special clear coat inspection flashlights and lamps, but those are very expensive. Luckily, an ordinary halogen lamp, whose color temperature is slightly yellow and close to sunlight, will work great.
In the case of LED lamps, it all depends on the color temperature of the light. If it’s in the 4000 K to 5000 K range, then the scratches will be perfectly visible. If the light color is higher, white / blue, then it’s more difficult to see the remaining scratches. When this is the only light we use, then after driving out into the full sun, it will most likely turn out that our work needs correcting.
The last stage, i.e. washing, degreasing and waxing
At the end, there is nothing else left but washing the car and pressure rinsing the paste from all corners. Removing paste residue from the car body is not so simple, but it’s necessary, especially before applying the wax.
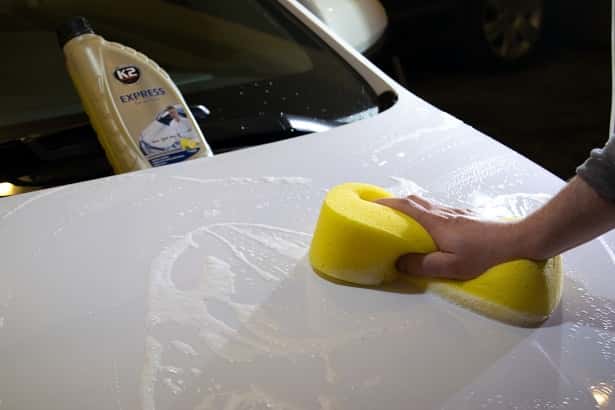
For this, we’ll need to use a good shampoo which can handle degreasing. Liquids made specifically to remove paste residue are also available. We clean the car with a very soft sponge using circular motions. Using a high pressure washer with a water heating function is also a good method.
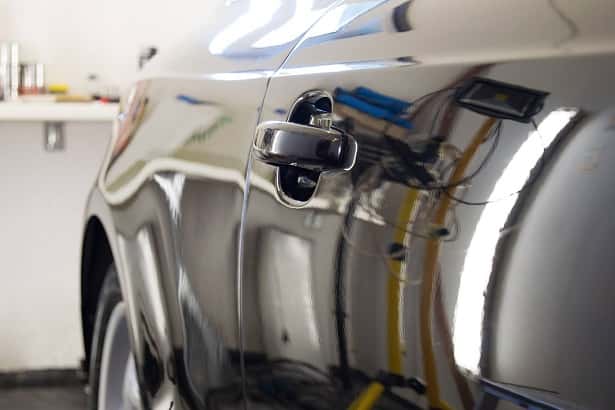
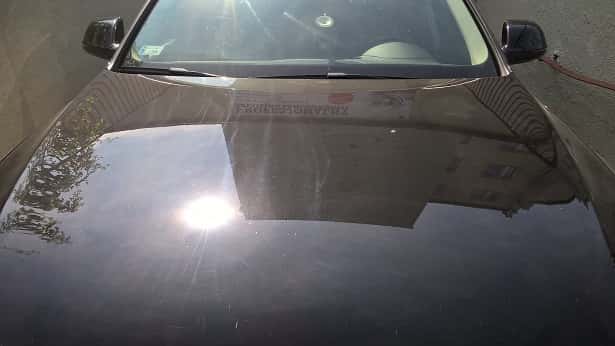
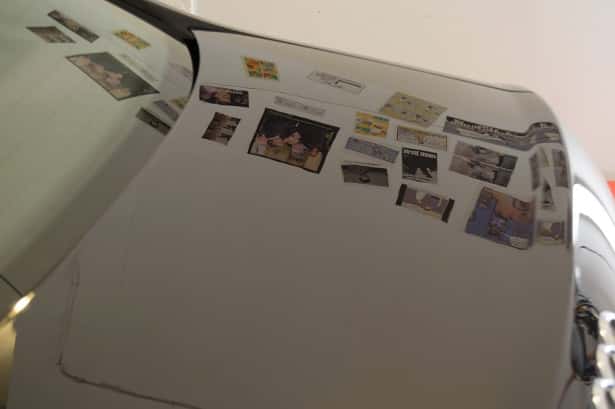
A good repair is one after which everything is reflects in the clear coat, like in the attached photo.
Then we need to dry the car before it dries on it’s own. This is most conveniently done using a large and absorbent microfiber cloth. The final step of clear coat repair will be the application of a good wax or a ceramic coating. Done!
Look also: ,,5 reasons for applying a ceramic coating”.


